Category: Travel Tips

  • How to Use an eSIM Abroad in 2026 Without Getting Hit by Roaming Charges

    A travel eSIM can be one of the easiest ways to stay online abroad, but only if you set it up correctly. The common mistake is buying a plan, scanning a QR code and assuming the phone will automatically use the right line. That is how people end up with the travel eSIM installed while their home SIM still uses expensive international data in the background.

    This guide explains how to use an eSIM abroad in 2026 from start to finish. It covers compatibility, installation, dual-SIM settings, data use, calls, hotspot access, troubleshooting and what to change when you return home. The goal is simple: keep your phone useful without turning connectivity into a surprise bill.

    Apple’s current international eSIM guidance explains that travelers can use a local or worldwide eSIM provider and choose which line handles mobile data. Apple also maintains a current list of carriers and worldwide eSIM providers. Android users should check the support page for their exact device because features and menu names differ by brand and model.

    What Is a Travel eSIM?

    An eSIM is a digital SIM profile stored on a compatible phone. Instead of inserting a plastic card, you install a mobile plan through a QR code, carrier app, activation link or built-in phone option. A travel eSIM usually gives you mobile data in one country, a region or a group of countries.

    The useful part is that many modern phones can keep more than one SIM profile. You can leave your home number active for messages or banking codes while directing mobile data through the travel line.

    Travel eSIM vs international roaming

    International roaming uses your existing carrier abroad. It is convenient because your number and service continue without much setup, but the price can be high unless your plan includes the destination. A travel eSIM is separate. You buy a data allowance for the destination and configure your phone to use it.

    Neither option is always cheaper. If your home plan already includes roaming, buying a second plan may be unnecessary. Compare the full cost first.

    Step 1: Check Whether Your Phone Supports eSIM

    Do this before buying anything. A plan that looks cheap is worthless if your phone cannot install it.

    On iPhone, go to Settings and look for the option to add an eSIM under Cellular or Mobile Data. Apple notes that availability depends on model, region and carrier. Some newer iPhone models sold in certain markets are eSIM-only, while other versions may support both a physical SIM and eSIM.

    On Android, search Settings for “SIM,” “eSIM,” “mobile network” or “SIM manager.” Google Pixel, Samsung Galaxy and other current devices often support eSIM, but regional variants can differ.

    Check whether the phone is carrier-unlocked

    A phone can support eSIM technology and still be locked to one carrier. If you want to install service from another provider, confirm that the device is unlocked. Do not wait until you land abroad to discover a carrier restriction.

    Step 2: Decide What Type of Plan You Need

    Travel eSIM plans generally fall into three groups: single-country, regional and global. The right choice depends on your route.

    • Single-country plan: best when you will spend most of the trip in one country.
    • Regional plan: useful for trips such as France-Spain-Portugal or Thailand-Malaysia-Singapore.
    • Global plan: convenient for frequent multi-region travel, but check whether the price per gigabyte makes sense.

    Do not buy based on the biggest data number alone. Check validity period, covered networks, whether 5G is available, hotspot rules, throttling policies and whether the plan begins when installed or only when it connects at the destination.

    Data-only vs phone-number plans

    Many travel eSIMs are data-only. That is fine for maps, messaging apps, email, social media and app-based calls. If you need a local phone number for reservations, business calls or delivery drivers, choose a plan that clearly includes voice and SMS or buy a local carrier plan.

    Step 3: Estimate How Much Data You Actually Need

    Most travelers overestimate normal map and messaging use, then underestimate video and hotspot use.

    A light user checking maps, messages, email and occasional social feeds may be comfortable with a few gigabytes for a week. A traveler uploading photos, streaming video and using a laptop hotspot can burn through the same amount quickly.

    Use this practical rule

    Think about your heaviest normal activity. If you will stream video every night, choose a larger plan or use hotel Wi-Fi for streaming. If the phone is mainly a navigation and communication tool, a moderate allowance is usually enough.

    Download offline maps before leaving. Save airline apps, hotel confirmations, rail tickets and important documents while you have reliable Wi-Fi. That reduces both data use and stress when coverage is weak.

    Step 4: Install the eSIM Before You Leave Home

    Installing at home is usually safer because you have stable Wi-Fi and time to fix problems. Read the provider’s activation rules first. Some plans start their validity timer on installation; others start only when the eSIM first connects to a supported network abroad.

    For iPhone, Apple’s current setup process allows carrier activation, carrier apps, QR codes and travel eSIM options depending on region and provider. The phone needs an internet connection for many setup methods.

    Label the lines clearly

    Name your home line “Home” and the new line “Travel.” This sounds minor, but it makes later settings much easier. When your phone asks which line should handle data, calls or messages, you will know exactly what you are changing.

    Take a screenshot of the installation instructions before you start, but protect QR codes and activation details. They may be single-use or tied to your account.

    Step 5: Configure Mobile Data Correctly

    This is the most important part. Your travel eSIM should normally be selected as the mobile-data line once you reach the destination.

    On iPhone, open Settings > Cellular or Mobile Data and choose the travel line for cellular data. Apple also explains that when both lines are active, you can keep the home line for iMessage, FaceTime or calls while the travel eSIM handles data.

    Turn off data roaming on your home line

    Unless your carrier plan specifically includes roaming and you intend to use it, turn off data roaming for the home SIM. This reduces the chance that the phone quietly falls back to expensive home-carrier data.

    Your travel eSIM may require data roaming to be turned on for that specific line because some travel providers connect through partner networks. Follow the provider’s instructions. The key is line-specific settings: home roaming off, travel roaming configured as required.

    Step 6: Decide What to Do With Your Home Number

    You do not always need to disable the home SIM. Keeping it active can be useful for incoming SMS codes, your normal messaging identity or urgent calls.

    But there is a cost risk. Some carriers charge for receiving or making calls abroad. Voicemail can also create roaming charges in certain setups. Check your carrier’s policy before departure.

    A safe setup for many travelers

    • Home line: enabled for number continuity, mobile data disabled, roaming disabled.
    • Travel line: enabled and selected for mobile data.
    • Messaging apps: continue using your normal account where possible.
    • Voice calls: use app-based calling over data unless you know the roaming price.

    This is a starting point, not a universal rule. Your home carrier and destination may make another configuration better.

    Step 7: Test the Connection Before Leaving the Airport

    Do not immediately get into a taxi and assume the connection will fix itself. Turn off airport Wi-Fi for a moment and verify that mobile data works.

    Open a simple website, load a map, and confirm the travel line shows network service. If the plan requires a specific APN, check the provider instructions.

    If the eSIM has signal but no internet

    Try these steps in order:

    1. Confirm the travel eSIM is turned on.
    2. Confirm it is selected as the mobile-data line.
    3. Check whether data roaming must be enabled for the travel line.
    4. Toggle airplane mode on and off.
    5. Restart the phone.
    6. Set network selection to automatic unless the provider specifies a partner network.
    7. Check the APN settings if the provider gave one.

    Changing ten settings at once makes troubleshooting harder. Make one change, test, then move to the next.

    How to Use eSIM on a Multi-Country Trip

    A regional eSIM can save time when crossing borders because you do not need to replace a physical SIM at every stop. But coverage quality can vary from country to country depending on the provider’s roaming partners.

    Before buying, check the full country list. “Europe” may not include every country you assume it does. The same applies to “Asia” or “Middle East” plans.

    Example: a 12-day Europe trip

    Imagine you travel from Italy to Austria to Hungary. A regional plan with all three countries may be easier than three separate plans. Install it before departure, use Italy as the first activation point, then verify the phone reconnects after each border crossing. If it does not, toggle airplane mode or restart the device before changing deeper settings.

    Can You Use Hotspot With a Travel eSIM?

    Often yes, but not always. Some plans allow tethering without limits, some cap hotspot data, and others prohibit it. Check before buying if you plan to connect a laptop, tablet or another traveler’s phone.

    Hotspot use can drain both data and battery faster than expected. A laptop may download cloud files, software updates or photo backups in the background.

    Make hotspot use predictable

    Set your laptop connection as metered if the operating system supports it. Pause automatic photo and cloud syncing. Download large files on trusted Wi-Fi. Carry a power bank that complies with airline rules.

    Travel eSIM Security: What Actually Matters?

    An eSIM does not make every internet connection secure by itself. You still need normal travel security habits.

    • Use a device passcode and biometric lock.
    • Keep the phone operating system updated.
    • Avoid entering sensitive information on unknown public Wi-Fi when mobile data is available.
    • Use official carrier or provider apps rather than random QR-code links.
    • Protect account recovery codes and eSIM activation information.

    If your phone is lost, contact the relevant carrier or provider and secure important accounts. Because the eSIM is built into the device, a thief cannot simply remove it like a physical card, but your phone and accounts still need protection.

    Common eSIM Mistakes That Cause Surprise Charges

    Mistake 1: Leaving home-data roaming on

    The travel line may be working while background services still use the home line. Check line-specific data settings.

    Mistake 2: Turning on automatic data switching without understanding it

    Some phones can switch data lines when one connection is weak. That can be helpful at home but risky abroad. If cost control matters, keep the travel line fixed for mobile data.

    Mistake 3: Buying an unlimited plan without reading the fair-use rule

    “Unlimited” can still include a high-speed threshold followed by reduced speeds. Check the policy if you need reliable video calls or hotspot use.

    Mistake 4: Deleting the eSIM too early

    Some eSIM profiles cannot be reinstalled without provider help. Do not delete a plan while troubleshooting unless the provider tells you to.

    Mistake 5: Forgetting the return-home settings

    When you land home, reselect your normal SIM for mobile data and verify your primary line is active. Apple notes that current iOS versions may automate part of this process for travel eSIMs in some regions, but you should still confirm the settings.

    Travel eSIM vs Local Physical SIM vs Roaming

    Choose an eSIM when you value quick setup, want to keep your home SIM installed, and have a compatible unlocked phone.

    Choose a local physical SIM when local plans are much cheaper, you need a local number, or your device does not support eSIM.

    Use home-carrier roaming when it is already included, the trip is very short, or staying on your normal number is more important than saving a small amount.

    The best solution is the one with the lowest total friction for your trip, not automatically the lowest advertised price per gigabyte.

    Pre-Flight eSIM Checklist

    • Confirm phone eSIM support.
    • Confirm carrier unlock status.
    • Check destination coverage.
    • Read the plan activation rule.
    • Install on reliable Wi-Fi.
    • Label home and travel lines.
    • Download offline maps and key documents.
    • Know whether the travel line needs data roaming enabled.
    • Turn off home-line data roaming unless included in your plan.
    • Save provider support details offline.

    Final Takeaway

    Using an eSIM abroad in 2026 is straightforward once you separate three decisions: which plan you buy, which line handles mobile data, and whether your home SIM is allowed to roam. Most expensive mistakes happen when those settings are left on automatic.

    Install the eSIM before departure when the plan allows it, label each line clearly, select the travel eSIM for data, and test the connection before leaving the airport. Keep your home number active only if you understand the call and SMS charges. With that setup, your phone can remain useful for maps, reservations, translation, messaging and emergencies without making roaming costs the most memorable part of the trip.

  • How to Find Cheaper Flights in 2026 With Google Flights and AI Price Tracking

    Finding a cheap flight is not the same as finding a good flight. A fare can look great until you add a bag, choose a seat, discover a six-hour overnight connection, or realize the airport is two hours from the city. In 2026, flight search tools are better at showing options, but the traveler still needs to judge total cost and trip quality.

    This guide shows how to use Google Flights as a research tool, how to use price tracking, how to compare dates and nearby airports, and when to stop waiting and book. Google also announced new travel features in August 2026 that bring flight price tracking into AI Mode in Search and can surface current options across hundreds of airline and travel partners. You can read the official update on the Google travel AI announcement.

    The goal here is not to chase one mythical “secret day” to book. The goal is to build a repeatable process that helps you spot a genuinely better fare while avoiding itineraries that save money on paper and cost you time, comfort or extra fees later.

    Start With a Travel Range, Not One Exact Flight

    The easiest way to overpay is to decide that you must fly on one exact date, from one exact airport, at one exact time. If your schedule allows it, start with a range.

    For example, instead of “New York to Rome on October 10,” search a one-week window around your preferred dates. Even moving the trip by one day can change pricing because demand differs across weekdays, weekends, school holidays and major events.

    Use flexible dates before changing the destination

    If Rome is the trip you actually want, first test nearby dates. Do not immediately switch to a different country because a search engine displays a lower fare there. Saving $120 is not useful if you spend the whole trip wishing you had gone somewhere else.

    Use Google Flights as a Comparison Layer

    Google Flights is useful because it lets you compare many airlines and booking options quickly. Treat it as a decision tool, not as an instruction to click the cheapest number you see.

    Search your route, then review:

    • departure and arrival times;
    • number and length of stops;
    • airport changes;
    • carry-on and checked-bag rules;
    • fare class and change rules;
    • whether the itinerary is sold directly by the airline or through another seller.

    The best option is usually the one that balances price with a schedule you can actually live with.

    Turn On Price Tracking Early

    Price tracking is most useful when you are interested in a route but not ready to buy immediately. Google lets travelers monitor fares, and its 2026 update extends flight price tracking into AI Mode for supported users.

    The benefit is not that an alert predicts the future perfectly. It is that you do not need to repeat the same manual search every morning.

    What to track

    Create one alert for your preferred dates. If your schedule is flexible, create a second search using nearby dates. For expensive long-haul trips, you may also track an alternate departure airport if it is realistically reachable.

    Do not create twenty alerts you will never compare. Three clear options are better than an inbox full of prices with different conditions.

    Check the Date Grid and Price Graph

    A flexible-date view can show whether moving the trip by a day or two changes the fare. The price graph helps you see the broader pattern across a period.

    This is especially useful for leisure travel. If Tuesday to Tuesday is much cheaper than Saturday to Saturday, ask whether changing leave dates is worth the saving.

    Compare the total trip, not only the flight

    A cheaper flight can create an extra hotel night or expensive airport transfer. Suppose Friday’s fare is $90 lower, but it arrives after public transport stops and requires a $70 taxi. The real saving is much smaller.

    Always compare the door-to-door cost.

    Search Nearby Airports Carefully

    Nearby airports can unlock better prices, but this is one of the easiest places to create a false bargain.

    For departure, include another airport only if you can reach it reliably. For arrival, check the transfer to your hotel. A low-cost airport may be far outside the city.

    A real-world example

    Imagine one flight arrives at the main airport at 3 p.m. and another arrives at a secondary airport at 11:30 p.m. The second fare is $60 cheaper. After a late bus, taxi, extra luggage fee and lost sleep, the first flight may be the better value.

    Put a dollar value on your time when comparing. Saving $25 for three extra hours of travel is not always a win.

    Use One-Way Searches to Test Open-Jaw Trips

    A round trip is not always the best shape for a multi-city holiday. An open-jaw itinerary means flying into one city and home from another.

    For example, fly into Tokyo and out of Osaka, or into Madrid and out of Barcelona. This can reduce backtracking and save a full travel day.

    Compare three versions

    1. Normal round trip.
    2. Multi-city open-jaw ticket.
    3. Two separate one-way tickets.

    Separate tickets can be useful, but be careful when they involve self-connections. If the first flight is delayed and the tickets are unrelated, the second airline may not protect you.

    Do Not Ignore Baggage in the First Search

    A base fare can be misleading. Low-cost carriers and basic-economy products may charge for larger cabin bags, checked bags, seat selection or changes.

    Before deciding that Airline A is cheaper than Airline B, price the trip with the baggage you will actually carry.

    Travel light only if it is realistic

    Do not book a no-bag fare because it looks cheap, then spend the week fighting a suitcase that does not meet the policy. If you need a checked bag, include it from the start.

    Also check whether baggage is through-checked on connecting itineraries. A self-transfer may require you to collect and recheck luggage.

    Understand Connection Quality

    Cheap itineraries often hide time cost in long or awkward connections. Review every stop.

    Ask four questions:

    • Is the connection at the same airport?
    • Do I need to clear immigration and security again?
    • Is the connection long enough to be safe?
    • Is it so long that I lose most of a day?

    A longer connection can be smarter

    The shortest legal connection is not always the best choice, especially at large international hubs. A slightly longer stop can reduce stress and protect the first day of your trip.

    If you are traveling with children, mobility needs or checked baggage, give yourself more margin.

    Check the Airline Directly Before Booking

    Once you find a good itinerary, open the airline’s official site and compare the same fare. Booking directly can make schedule changes, seat issues and refunds easier to manage because there is no third party between you and the airline.

    This does not mean third-party booking is always wrong. Sometimes an online travel agency offers a meaningful saving or package benefit. Just understand the support path before paying.

    Verify the fare details line by line

    Check flight number, cabin, baggage, change rules and passenger names. A small difference in fare class can explain why one seller appears cheaper.

    Use AI Mode for Research, Not Blind Booking

    Google’s August 2026 update says AI Mode can help travelers track flight prices, compare options and use real-time travel data. That can reduce the work of building a search from scratch.

    The right way to use AI is to ask for constraints, then verify the final itinerary yourself.

    Useful prompts are specific

    Instead of asking “find me a cheap flight,” specify your real limits:

    • maximum one stop;
    • no overnight airport change;
    • checked bag required;
    • arrival before 8 p.m.;
    • flexible by two days;
    • avoid a specific airport if needed.

    Better constraints produce more useful comparisons.

    When Should You Book?

    There is no universal number of days that guarantees the cheapest fare. Prices react to demand, capacity, season, route competition and events.

    Use a practical decision rule instead: if the fare fits your budget, the schedule is good, and the trip dates matter, book when the risk of losing the itinerary is more important than the chance of saving a little more.

    Book earlier when flexibility is low

    If you must travel during school holidays, a wedding, a festival or a fixed work break, waiting for a perfect discount can backfire. Your best departure time may disappear even if another cheaper flight remains.

    If your trip is flexible and you can move both dates and airports, you have more room to track prices.

    Do Incognito Mode and Repeated Searches Change the Fare?

    Travelers often worry that searching a route repeatedly forces the price up. Airfares do change frequently, but those changes can come from inventory, fare-bucket availability and demand across the market.

    The productive response is not to spend hours clearing cookies. Record the exact itinerary and fare, turn on tracking, and compare changes over time.

    Use screenshots for complex fares

    If a multi-city itinerary has a good price, save a screenshot with the date, fare and flight numbers. If the price changes later, you can tell whether you are comparing the same product.

    Watch for Self-Transfer and Separate-Ticket Risk

    A search tool may surface combinations that require you to collect bags, change terminals or even change airports. These can save money, but you take more responsibility.

    If the first ticket is delayed, the second carrier may treat you as a no-show. Travel insurance may help in some situations, but coverage varies.

    Use a bigger buffer

    For separate tickets, do not use the same minimum connection time you would accept on one protected ticket. Build in hours, not minutes, and check whether an overnight stay is smarter.

    Compare Cash Price With Points or Miles

    Google’s 2026 travel update also highlights points and miles information in travel planning. If you collect airline or credit-card rewards, compare the real value before redeeming.

    A redemption that uses 60,000 points plus high taxes for a $500 ticket may be poor value. The same points on an expensive peak-season flight could be much more useful.

    Do not let points dictate the whole trip

    Rewards are a payment tool, not a reason to take an inconvenient itinerary. A six-hour detour to save a small number of points is rarely worth it.

    A 15-Minute Flight Search Workflow

    Use this routine when you are ready to research:

    1. Search your preferred route and dates.
    2. Open the date grid and test plus or minus three days.
    3. Check one realistic nearby airport.
    4. Filter out connections you would never accept.
    5. Add baggage mentally or through the fare details.
    6. Open the best two or three options.
    7. Compare the airline’s direct price.
    8. Turn on price tracking if you are not ready to book.
    9. Write down your “buy price,” the fare you are happy to pay.

    This prevents endless searching. You have a process and a decision point.

    Common Cheap-Flight Mistakes

    Waiting after finding a genuinely good fare

    If the trip is fixed and the price already fits your budget, waiting another week for a tiny saving can cost you the best schedule.

    Choosing a terrible itinerary to save a small amount

    Protect your first vacation day. A 17-hour journey that saves $40 is not automatically cheaper in real terms.

    Forgetting visa and transit rules

    A cheap connection can require transit permission or immigration procedures. Check official government rules for your nationality and route.

    Booking separate tickets without enough buffer

    Price is only one risk. Missed onward travel can erase the saving immediately.

    Final Takeaway

    The best way to find cheaper flights in 2026 is to combine flexible searching with clear limits. Use Google Flights to compare dates, airports and schedules. Use price tracking so you do not need to search manually every day. Use AI Mode to narrow the field, but verify the final fare and conditions yourself.

    Most importantly, compare total trip value. Include bags, airport transfers, connection time, hotel nights and the risk of separate tickets. A flight is cheap only when it saves money without quietly making the rest of the trip worse.

  • How to Plan a Shoulder-Season Europe Trip in 2026 Without Overpaying

    How to Plan a Shoulder-Season Europe Trip in 2026 Without Overpaying

    How to Plan a Shoulder-Season Europe Trip in 2026 Without Overpaying

    Europe is not automatically cheap outside summer, but shoulder season can give you a better balance of price, weather, and crowds. In 2026, more travelers are looking beyond peak July and August trips because popular cities are crowded, heat can be intense, and hotel rates can rise fast. Fall and spring can solve some of those problems, but only if you plan around local weather, school holidays, major events, and seasonal closures.

    This guide shows you how to build a shoulder-season Europe trip step by step. It is for travelers who want to save money without ending up in a destination when half the attractions are closed or the weather ruins the plan. You will learn how to choose dates, compare regions, book transport, pick hotels, pack, and create a flexible daily schedule.

    For official entry rules and destination information, always check the relevant national tourism office and government pages before travel. For EU travel basics, Your Europe is a useful starting point.

    What Counts as Shoulder Season in Europe?

    There is no single shoulder season for the whole continent. The best dates depend on where you are going.

    For many central and northern European cities, shoulder periods often fall in April to May and September to October. Mediterranean destinations may stay warm later into fall, while Alpine regions can enter a quiet gap between summer hiking and winter ski seasons. Islands can also have different ferry schedules and business hours outside peak months.

    Why This Matters

    If you simply choose “October” because a blog says it is shoulder season, you may still hit a festival weekend with high hotel prices. Or you may arrive at a coastal town where beach clubs, ferries, and seasonal restaurants have already reduced service.

    Think in terms of a destination-specific shoulder season, not a Europe-wide rule.

    Step 1: Pick the Experience Before the Destination

    Start by deciding what you want from the trip. This makes it easier to choose a region and month.

    • Museums and city walking: Copenhagen, Vienna, Paris, Madrid, Berlin, Prague, and similar cities can work well in cooler months.
    • Food and wine: Harvest periods in parts of Italy, Spain, France, and Portugal can add seasonal interest.
    • Coast and swimming: Aim for earlier fall or later spring in southern Europe rather than late October.
    • Hiking: Check trail, lift, and weather conditions carefully in mountain areas.
    • Christmas markets: These are not shoulder season in the usual sense. Demand can be very high in late November and December.

    A traveler who wants galleries, cafes, and architecture can accept a rainy day more easily than someone planning a beach holiday. That one decision should guide the rest of the trip.

    Step 2: Compare Three Date Windows, Not One

    Do not search flights for only one weekend. Compare at least three nearby windows. For example, if you want a fall trip, compare late September, early October, and late October.

    What to Compare

    • Round-trip airfare
    • Hotel rates for the same neighborhoods
    • Average daylight
    • Expected temperature and rain
    • Local holidays and school breaks
    • Major concerts, conferences, festivals, or sports events

    A flight that is $80 cheaper can be a bad deal if hotels are $70 more per night because of a major event.

    Step 3: Use a Total-Trip Price, Not a Flight-Only Price

    Cheap airfare is attractive, but it is only one part of the trip. Build a quick spreadsheet or note with these costs:

    • Flights
    • Airport transport
    • Accommodation
    • Intercity trains or buses
    • Attraction tickets
    • Travel insurance
    • Daily food estimate
    • Local transit
    • Baggage fees

    Then compare destinations using the total. A city with a slightly more expensive flight but cheaper hotels and better public transport may be the lower-cost trip overall.

    Real-World Example

    Imagine you are choosing between Paris and Vienna for five nights. Paris has a cheaper flight, but the central hotel you want costs much more. Vienna’s airfare is higher, yet the hotel and airport transfer are cheaper. Once you add the whole trip, Vienna may cost less. The correct decision is based on the total, not the first number you see in a flight search.

    Step 4: Check Local Calendars Before Booking Hotels

    This is one of the most overlooked travel steps. Search the official city calendar and the local convention or events calendar.

    Large trade fairs can fill hotels in cities such as Frankfurt, Milan, Barcelona, and Paris. Football matches can also raise demand in some areas. Fashion weeks, marathons, festivals, and school holidays can change prices quickly.

    A Simple Rule

    If hotel prices look unusually high for a shoulder-season date, do not assume the city is simply expensive. Check what is happening that week.

    Step 5: Choose a Base That Reduces Transport Waste

    A cheaper hotel far from the center is not always cheaper in practice. You may spend more on daily transport and lose one or two hours each day.

    Look for neighborhoods near a metro, tram, or main rail line. You do not need to stay beside the biggest landmark. You do need to be able to reach the places you care about without awkward transfers.

    Good Location Test

    Before booking, open a map and check the route from the hotel to three places you know you will visit. If every trip needs multiple changes or a long walk at night, reconsider the hotel.

    Step 6: Book Rail Based on the Country

    Europe does not have one universal rail system. Use official operators whenever possible.

    Examples include SNCF Connect in France, Trenitalia in Italy, Deutsche Bahn in Germany, and ÖBB in Austria.

    High-speed and long-distance fares may rise closer to departure. Regional trains often work differently. Read the fare rules before choosing the cheapest ticket because low fares can be non-refundable or tied to one departure.

    When a Rail Pass Makes Sense

    A rail pass can be useful for a trip with many long-distance journeys and a need for flexibility. It is not automatically the cheapest choice. Compare the pass price with point-to-point tickets for your actual route.

    Step 7: Use Open-Jaw Flights for Multi-City Trips

    If you plan to visit several cities, check whether you can fly into one city and home from another. This is often called an open-jaw itinerary.

    For example, you could fly into Rome, travel north by train, and fly home from Milan. That avoids spending time and money returning to Rome only to catch a flight.

    When It Helps Most

    Open-jaw flights are especially useful when your route moves in one clear direction. They are less useful when the arrival and departure airports have much higher fares than a standard return ticket. Compare both options.

    Step 8: Build a Weather-Proof Itinerary

    The main trade-off of shoulder season is weather. The solution is not to predict every rainy day. It is to create days that can be rearranged.

    Use the Indoor-Outdoor Pairing Method

    For each day, pair one outdoor activity with one indoor activity. For example:

    • Old-town walk + art museum
    • Market visit + palace tour
    • Park + food hall
    • River walk + historic church or gallery

    If rain arrives, reverse the order. You still get most of the day without losing prepaid tickets.

    Step 9: Pack for Layers, Not One Forecast

    Shoulder-season forecasts can swing. A morning may feel cold, midday can be warm in the sun, and evening may turn windy.

    Useful Packing List

    • Light waterproof jacket
    • One warm mid-layer
    • Comfortable water-resistant shoes
    • Compact umbrella
    • Light scarf
    • Quick-dry basics
    • Small day bag
    • Portable power bank

    Avoid packing several bulky coats. Layers give you more combinations with less luggage.

    Step 10: Check Daylight Before Planning Day Trips

    Fall daylight gets shorter as you move north. A scenic day trip that works easily in September may feel rushed in late October.

    Use sunrise and sunset times when building outdoor days. Start nature-focused trips earlier and keep museums or restaurants for the evening.

    How to Save on Food Without Eating Poorly

    Food is one of the easiest areas to control without making the trip worse.

    Use a Two-Level Meal Strategy

    Choose one meal each day where you spend more, then keep the other meals simple. A bakery breakfast, market lunch, or grocery-store picnic can balance a nicer dinner.

    In 2026, grocery-store tourism has also become a real travel trend. Visiting a local supermarket can be useful, not just cheap. You see regional snacks, drinks, produce, and everyday products that may never appear in tourist restaurants.

    Avoid Eating Beside the Main Landmark by Default

    Walk a few streets away and check menus before sitting down. Tourist zones are not always bad, but they often charge more for location.

    How to Avoid Shoulder-Season Closures

    City attractions usually operate year-round, but coastal towns, islands, and mountain destinations can reduce services.

    Check These Before Booking

    • Ferry frequency
    • Cable car or lift schedules
    • Seasonal hotels
    • Beach facilities
    • Mountain huts
    • Guided tours
    • Restaurant opening days

    Always check the official website for the specific attraction. Third-party listings can keep outdated hours.

    Travel Insurance Matters More When Plans Depend on Weather

    Insurance does not remove all risk, and not every policy covers the same situations. Read the policy before buying.

    Look at medical coverage, trip interruption, cancellation terms, baggage, and any exclusions that apply to activities such as hiking, skiing, or rental cars. Do not assume the cheapest policy offers the protection you need.

    Should You Prebook Attractions?

    Louisiana Museum of Modern Art on the Danish coast during a Europe trip
    Popular museums can stay busy outside summer, so prebook the few places that would be disappointing to miss while keeping the rest of the itinerary flexible.

    Prebook only the places where it clearly helps. Shoulder season can mean shorter lines, so you may not need a rigid schedule.

    Book Ahead When

    • The attraction has limited entry slots.
    • You are visiting on a weekend.
    • It is a famous site with year-round demand.
    • You need a specific guided tour.

    Stay Flexible When

    • Weather strongly affects the experience.
    • Tickets are widely available on the day.
    • You are unsure how much energy you will have.

    A 7-Day Shoulder-Season Europe Planning Template

    Here is a realistic structure for a one-week trip with two bases:

    • Day 1: Arrival, neighborhood walk, early dinner.
    • Day 2: Main city sights and one museum.
    • Day 3: Local neighborhood, food market, flexible attraction.
    • Day 4: Train to second city, easy evening.
    • Day 5: Major sights and one booked experience.
    • Day 6: Weather-dependent day trip.
    • Day 7: Free morning and departure.

    This format avoids moving hotels every night and keeps one day flexible for weather.

    Common Shoulder-Season Mistakes

    Booking Only for the Lowest Price

    A cheap date with poor transport, closures, or very short daylight may not be good value.

    Assuming Fewer Crowds Means No Crowds

    Major attractions in Paris, Rome, Amsterdam, and Barcelona can stay busy all year. Book essential sites if missing them would ruin the trip.

    Packing for Winter When You Need Layers

    Heavy luggage is annoying on trains and cobbled streets. Pack items you can combine.

    Changing Cities Too Often

    Every hotel change uses time. For a seven-day trip, two bases are often enough.

    Ignoring Local Events

    A conference or festival can erase the savings you expected from traveling off-peak.

    How Far Ahead Should You Book?

    There is no perfect number of months, but start tracking flights and hotels early enough to understand normal prices. If your dates include weekends, school breaks, or a major event, book sooner.

    For flexible travelers, price alerts can help. For travelers with fixed vacation dates, waiting for a dramatic last-minute discount can be risky because the best-located hotels may disappear first.

    Final Takeaway

    A good shoulder-season Europe trip is not simply a summer itinerary moved to October. The season changes daylight, weather, transport, and local opening hours. Plan around those realities and the trip can be calmer, more affordable, and more enjoyable.

    Start with the experience you want, compare several date windows, calculate total-trip cost, check events, stay near useful transport, and keep one or two days flexible. Use official rail and attraction websites for current information. Most importantly, leave enough time to enjoy the place rather than using lower crowds as an excuse to schedule even more.

    Shoulder-Season Europe Visual Examples

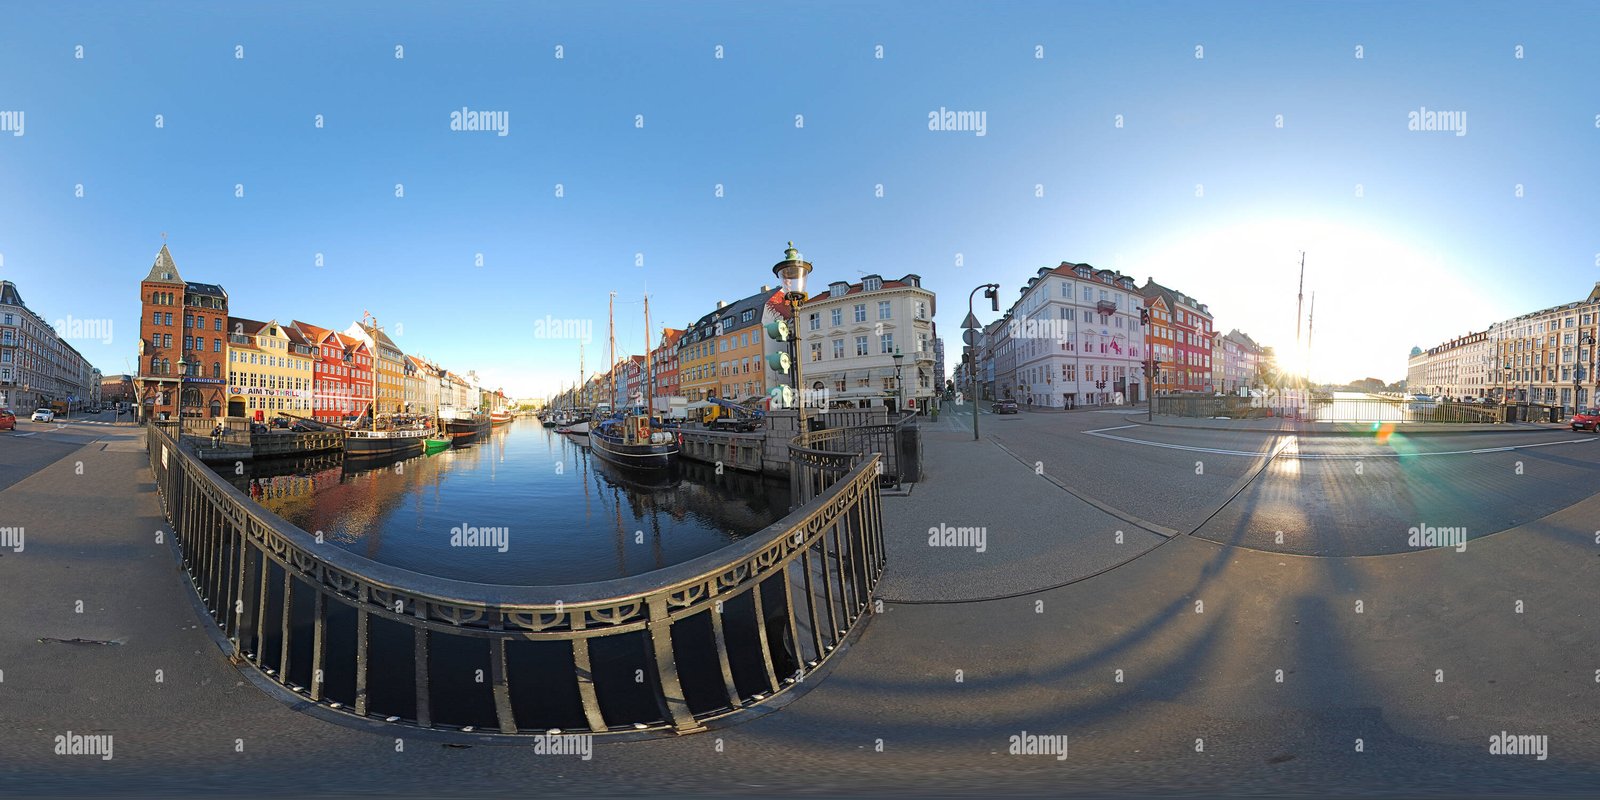
    Street scene in Nørrebro Copenhagen for neighborhood travel guide
    A walkable neighborhood can be a better shoulder-season base than a cheaper hotel that requires long daily transfers.
    Torvehallerne food market in Copenhagen Denmark
    Indoor markets are useful weather-proof stops and can also keep lunch costs lower than a full restaurant meal.
    Kronborg Castle in Helsingør on a Danish Riviera day trip
    Day trips still work in shoulder season, but shorter daylight makes early starts and realistic travel times more important.
    Louisiana Museum of Modern Art near Humlebæk Denmark coast
    Pairing an indoor museum with an outdoor walk keeps the itinerary useful even when rain or wind changes the day.
  • Noctourism in 2026: How to Explore Cities at Night Safely and Beat the Heat

    Noctourism in 2026: How to Explore Cities at Night Safely and Beat the Heat

    Noctourism in 2026: How to Explore Cities at Night Safely and Beat the Heat

    Night travel is no longer just about bars and clubs. In 2026, more travelers are planning museum evenings, sunset walks, stargazing, night markets, late-opening landmarks, and guided after-dark tours. This trend is often called noctourism. It is gaining attention for a simple reason: cities can feel cooler, calmer, and visually different after sunset.

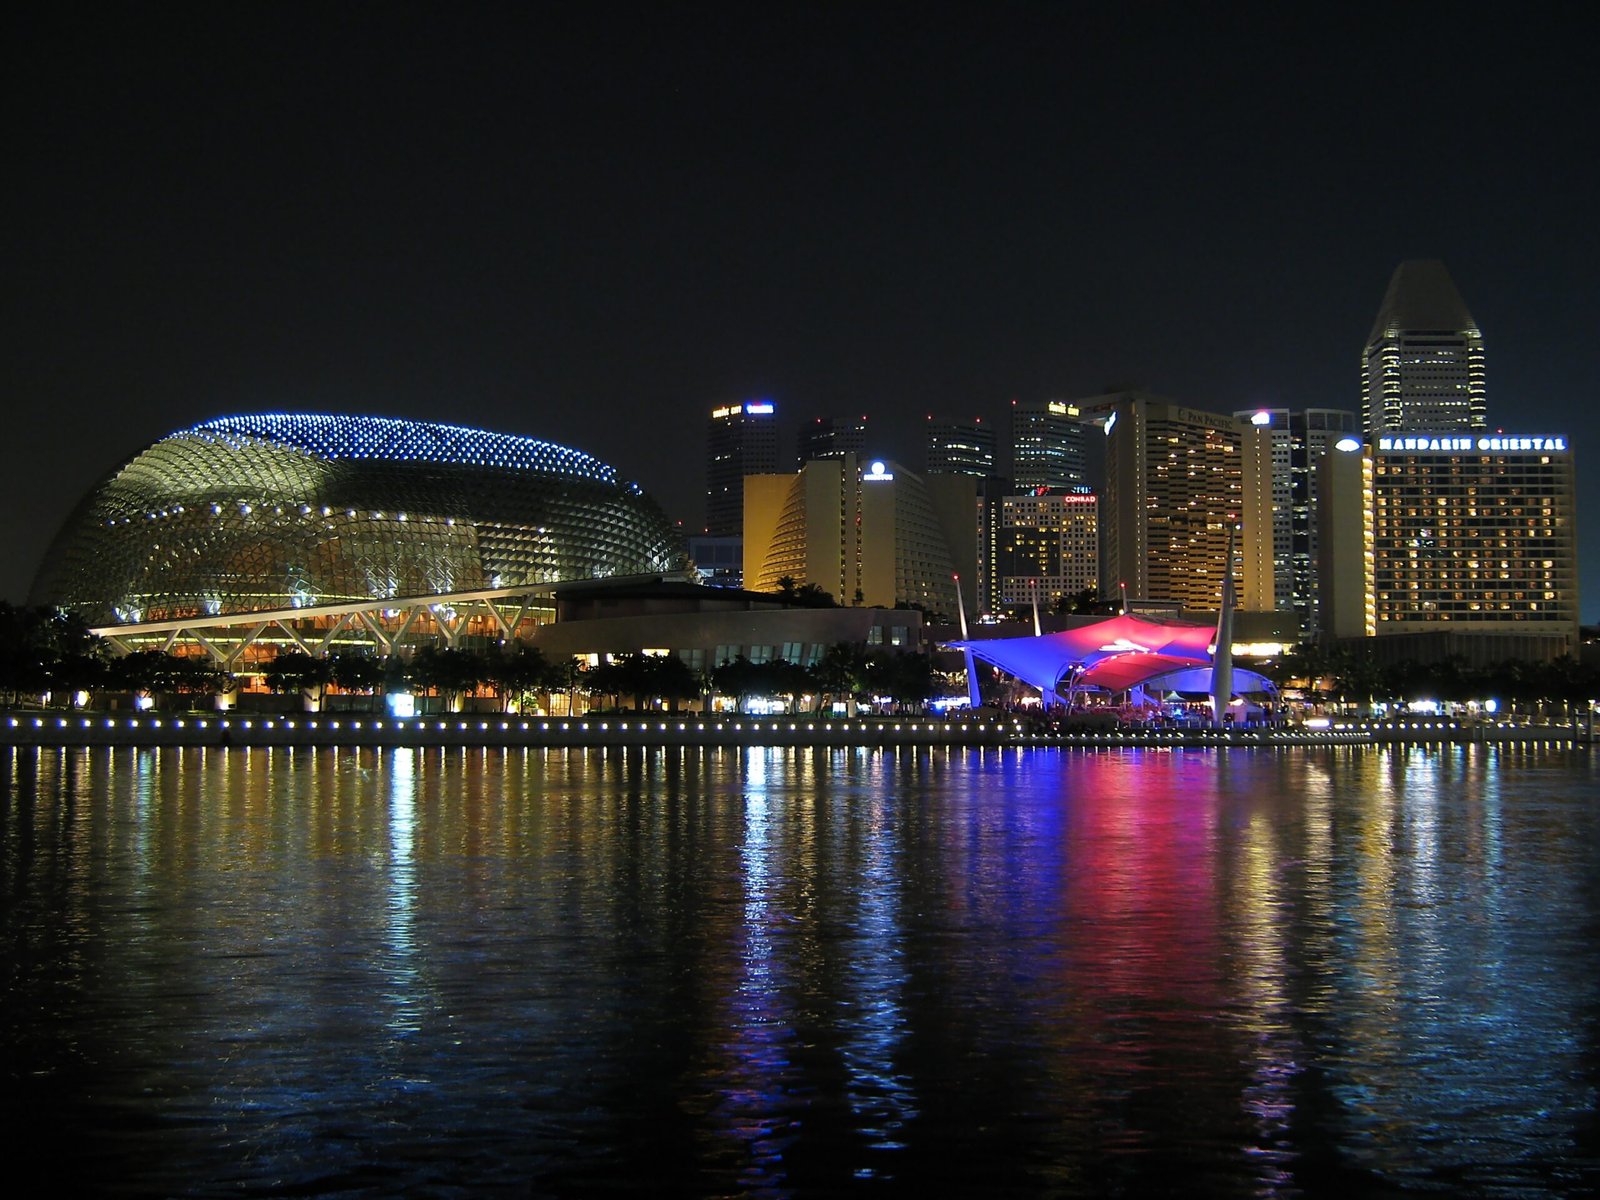
    Illuminated Singapore skyline showing a well-lit area for night sightseeing
    Well-lit active districts are easier to navigate after dark. Photo: Mokkie, CC BY-SA 4.0.

    That does not mean every daytime activity should be moved to midnight. The best night itinerary is deliberate. You need safe transport, realistic opening hours, a clear route, and a plan for getting back to your hotel. This guide explains how to use noctourism as a practical travel strategy, especially in hot destinations or crowded cities.

    Always check official destination pages, attraction schedules, and local transport operators before heading out. Opening hours and last-train times can change by season or day of the week.

    What Is Noctourism?

    Noctourism means traveling or sightseeing after dark as a main part of the experience. It can include:

    • Night markets
    • Late museum openings
    • Illuminated historic areas
    • Sunset and evening cruises
    • Stargazing
    • Night safaris
    • After-dark walking tours
    • Evening food tours
    • Night photography
    • Concerts or cultural performances

    The idea is not new, but travelers are using it more intentionally. Rising daytime temperatures in some destinations, crowded attractions, and interest in immersive local experiences all make evening travel more appealing.

    Why Night Sightseeing Can Improve a Trip

    Cooler Temperatures

    In hot destinations, walking after sunset can be much more comfortable than exploring at 2 p.m. This is especially useful in parts of southern Europe, the Middle East, and Asia during warmer months.

    Fewer Day-Trip Crowds

    Some historic districts become quieter after tour buses leave. You may still see local evening crowds, but the experience can feel less rushed.

    Different Atmosphere

    Lighting changes architecture, waterfronts, plazas, and old streets. A place you saw at noon can feel completely different after sunset.

    More Flexible Days

    Night activities let you rest during the hottest hours or spend midday indoors. That can make a long trip less exhausting.

    Step 1: Check Whether the Destination Actually Works at Night

    Do not assume every tourist area stays active after dark. Some places close early. Others become lively only after 8 p.m.

    Research These Five Things

    • Last entry time for attractions
    • Public transport operating hours
    • Whether the area is active after dark
    • Availability of licensed taxis or ride-hailing
    • Lighting and pedestrian access

    A famous viewpoint may be beautiful at sunset but unsafe or inaccessible after the official closing time. Always respect barriers and posted hours.

    Step 2: Build a Short Night Route

    City skyline at dusk for planning a compact evening sightseeing route
    A dusk start gives travelers time to see a city transition into night. Photo: chenisyuan, CC BY-SA 4.0.

    A good night route is compact. You do not want to cross a large city several times after transport frequency drops.

    Choose two or three stops in one area. For example:

    • Sunset viewpoint
    • Dinner or food market
    • Illuminated landmark

    Then return to your hotel using one simple route.

    Realistic Example

    Suppose you are in a hot Mediterranean city. Instead of visiting the old town at midday, spend the afternoon in a museum. Return to the hotel for a break. Go out around sunset, walk the historic center, eat dinner nearby, and take a direct metro or taxi back. This reduces heat exposure and avoids needless backtracking.

    Step 3: Decide Your Return Transport Before You Leave

    This is one of the most important night-travel habits. Do not wait until 12:30 a.m. to learn that the metro stopped at midnight.

    Before Going Out, Confirm

    • Last metro or train
    • Night-bus routes
    • Taxi stands
    • Ride-hailing availability
    • Estimated walking time
    • Whether your hotel reception is open late

    Save the hotel address offline in the local language when useful. A screenshot can help if your connection fails.

    Step 4: Use the “One-Way Safety Check”

    Before committing to a night stop, ask: if my phone battery dies or the train stops, can I still get back safely?

    If the answer depends on one fragile option, choose a different route or finish earlier. This simple test is more useful than generic advice like “be careful.”

    Step 5: Protect Your Phone Battery

    At night, your phone does more work. You may use maps, translation, tickets, camera, transport apps, and ride-hailing.

    Battery Plan

    • Leave the hotel with at least 70% battery when possible.
    • Carry a small power bank.
    • Download offline maps.
    • Save your hotel address.
    • Lower screen brightness when you do not need it.
    • Avoid filming long videos if your battery is low.

    Step 6: Dress for Temperature Changes

    A city that feels hot at sunset can turn cool near the water or after midnight. Carry one light layer if the forecast suggests a drop.

    Comfortable shoes matter even more at night because uneven streets, steps, and dim lighting can make poor footwear a problem.

    Step 7: Choose Well-Lit, Active Areas

    Night travel does not require staying only on the busiest tourist street, but avoid shortcuts through empty parks, unlit alleys, isolated beaches, or construction zones when you do not know the area.

    If locals are leaving an area and businesses are closing, treat that as useful information. You do not need to stay just because a map says the attraction is nearby.

    Step 8: Be Careful With Alcohol

    Night tourism can include bars, wine tastings, or nightlife. Keep your transport plan realistic if you drink.

    • Do not drive.
    • Keep control of your drink.
    • Know how you are getting home before drinking heavily.
    • Stay with your group in unfamiliar areas.
    • Avoid walking long distances alone when impaired.

    The goal is not to remove fun. It is to avoid turning a good night into a preventable problem.

    Night Markets: How to Enjoy Them Without Wasting Time

    Busy Asian night market with food stalls after dark
    Night markets work best when travelers first scan the stalls, compare queues, and then choose food instead of buying at the first counter.
    Night travel scene in Singapore showing an active evening destination
    Busy evening areas work best when dining, walking, and return transport are planned in one compact zone.

    Night markets can be one of the best ways to combine food, local shopping, and atmosphere. They can also be crowded and repetitive if you arrive without a plan.

    Smart Night-Market Strategy

    Walk one full loop before buying a large meal. You will see what is available, compare queues, and avoid filling up at the first stall. Carry small local currency where cards are not widely accepted.

    Look for stalls that cook food fresh and have steady customer turnover. Follow local food-safety guidance and avoid food that has been sitting unrefrigerated for long periods.

    Late-Opening Museums and Galleries

    Some museums offer late hours on specific evenings. This is a strong option because it moves an indoor activity away from the middle of the day and can free daylight for outdoor sightseeing.

    Check the official museum website instead of relying on an old travel article. Late openings may be seasonal or limited to one day per week.

    Why This Works Well

    A late museum visit is also easy for solo travelers. It is structured, well-lit, staffed, and usually close to transport.

    Stargazing: One of the Best Forms of Noctourism

    Dark sky stargazing landscape with stars at night
    Stargazing needs darker skies, safe access, suitable weather, and enough time for your eyes to adjust to low light.

    Stargazing is a strong 2026 travel interest, but it requires more planning than city sightseeing.

    Check These Conditions

    • Cloud cover
    • Moon phase
    • Light pollution
    • Road access
    • Temperature
    • Park or reserve rules

    If you are going to a remote dark-sky area, a guided tour can be safer than self-driving on unfamiliar rural roads late at night.

    Night Photography Without Carrying Too Much Gear

    You do not need professional equipment for useful night photos.

    With a Phone

    • Clean the lens before shooting.
    • Use night mode when available.
    • Hold the phone against a wall or railing for stability.
    • Avoid digital zoom.
    • Tap the brightest area to control exposure.

    With a Camera

    A small tripod can help, but check whether tripods are allowed. Some museums, rooftops, and crowded squares restrict them.

    Destination Example: Kyoto After Dark

    Kyoto is a good example of why night sightseeing can work. Famous areas can be extremely busy during the day, while evenings can feel calmer. Historic districts such as Gion require respectful behavior because they are living neighborhoods, not film sets.

    Use Kyoto City Official Travel Guide for current visitor guidance, rules, and seasonal information. Respect photography restrictions and private property.

    Destination Example: Singapore

    Singapore Marina Bay skyline at night for noctourism travel
    Singapore is well suited to planned night sightseeing because major waterfront areas stay active and public transport remains useful into the evening.
    Singapore waterfront skyline illuminated at night for noctourism planning
    Singapore is a practical night-travel example because many waterfront areas remain active and connected by public transport.

    Singapore is well suited to evening travel because public areas are well lit, transit is efficient, and many attractions operate into the evening. Waterfront walks and food centers can be more comfortable after the daytime heat drops.

    Use Visit Singapore for current attraction and event information.

    Practical Plan

    Spend midday at an indoor attraction, take a late-afternoon rest, then visit a hawker center followed by a waterfront walk. Check the last MRT timing before staying out late.

    Destination Example: Dubai

    Dubai skyline at night with illuminated city buildings
    Dubai is a practical example of using evening hours to avoid some daytime heat while keeping transport and dining options available.

    Dubai is another destination where evening planning can be useful, especially in warmer periods. Malls, dining areas, waterfront districts, and some attractions stay active late.

    Check Visit Dubai for current operating hours and seasonal events.

    Even when a city feels active at night, heat can remain high. Hydration and sun exposure during the day still matter.

    Destination Example: New York City

    New York offers museums, observation decks, Broadway, restaurants, and illuminated landmarks after dark. The challenge is not finding something to do; it is avoiding an overpacked night.

    Use the Metropolitan Transportation Authority for current subway service changes because late-night maintenance can alter routes.

    How Solo Travelers Can Plan Safer Night Sightseeing

    Solo travel does not mean you must return to the hotel at sunset. It does mean your backup plan matters more.

    Useful Solo Habits

    • Share your evening plan with someone you trust.
    • Keep your phone charged.
    • Use busy transport stops.
    • Do not advertise that you are carrying large amounts of cash.
    • Choose licensed transport.
    • Stay aware when using headphones.
    • Leave any situation that feels wrong without worrying about being polite.

    How Families Can Use Noctourism

    Families can benefit from evening sightseeing too, especially in hot climates. The key is sleep and transport.

    Do not plan a late night immediately before a 6 a.m. tour. Choose one or two special evenings during the trip and keep the next morning slower.

    Night markets, illuminated gardens, early-evening cruises, and cultural shows can be easier with children than midnight walking tours.

    Heat-Smart Day Planning

    Noctourism works best when it changes the whole day, not just the evening.

    A Practical Hot-Weather Schedule

    • 7:30 a.m.: Outdoor sightseeing
    • 11:30 a.m.: Lunch
    • 1:00 p.m.: Museum, mall, hotel rest, or indoor activity
    • 5:30 p.m.: Early dinner or sunset stop
    • 7:00 p.m.: Evening sightseeing
    • 10:00 p.m.: Return transport

    This reduces time in peak heat and gives your body a break.

    Common Noctourism Mistakes

    Assuming a Popular Area Is Safe at Every Hour

    Conditions can change late at night. Check current local advice and transport.

    Forgetting Last Entry

    An attraction may close at 10 p.m. but stop admitting visitors at 9 p.m.

    Using an Isolated Shortcut

    A ten-minute saving is not worth an uncomfortable route in an unfamiliar city.

    Overloading the Night

    Sunset, dinner, market, rooftop, museum, and a show in one evening is too much for most travelers.

    Ignoring Sleep

    Several late nights can damage the rest of your trip. Build recovery time into the next morning.

    Night Travel Checklist

    • Check opening and last-entry times.
    • Confirm the return route.
    • Charge your phone.
    • Download offline maps.
    • Save your hotel address.
    • Carry a small power bank.
    • Bring water where appropriate.
    • Choose a compact route.
    • Stay in active, well-lit areas.
    • Keep one backup transport option.

    A Simple Rule for Choosing a Night Activity

    Before adding an after-dark activity, check three things: value, logistics, and recovery. The activity should offer something you cannot get as easily during the day, such as cooler weather, a night market, a performance, or a better atmosphere. The return route should be simple and still operate when the activity ends. Finally, make sure the late finish will not damage the next morning. If an evening plan creates two complicated transfers, a very short sleep window, or a long walk through an unfamiliar quiet area, choose an earlier version or a different activity.

    Final Takeaway

    Noctourism can make a trip more comfortable and more memorable, but it works best as a planning method rather than a trend to follow blindly. Use night hours to avoid extreme heat, see a different side of a city, enjoy markets and culture, or spend time under dark skies.

    The practical rule is simple: plan your return before your evening begins. Keep the route compact, check official hours, protect your phone battery, and choose activities that genuinely improve the trip. When done well, after-dark travel does not replace daytime sightseeing. It gives you another way to experience the destination.